
Voron 0.1 Printer Kits by LDO
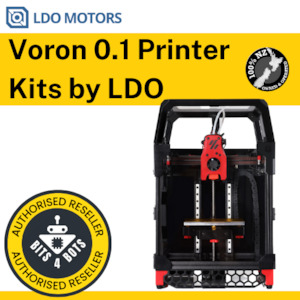
These printers are here in the country and ready to ship
NOTE : THIS KIT DOES REQUIRE PRINTED PARTS. We can also provide printed parts at additional cost.
NOTE : We have personally tried and tested these kits by LDO Motors. You are more than welcome to come and check these out at our warehouse.
NOTE : Shipping cost will be added on at the end based on each persons location.
Note : Payment will have to be by Bank Transfer or will incur a card fee
Bed Size - X120mm x Y120mm x Z120mm
-------------------------------------------------------------------------------------
Before buying this kit please note the following disclaimers/information.
--------------------------------------------------------------------------------------
- If you have never touched a 3D printer, do not buy this kit.
- This is a significant project/build to undertake. DC electronics, advanced 3D printer knowledge is recommended. It is assumed you know how to crimp cables, own a crimper and have sourced/printed the required 3D Parts to complete the build. Experienced Voron builders take 25-30 hours to complete a build. It's not uncommon for first-time builders to be taking 40-50 hours before everything is complete and ready to print.
- It is recommended you read the assembly manual in completion before committing to purchase and build a kit.
- Read our Voron Buying Guide & F.A.Q. in completion & note that we do not provide technical / building support via phone - We only support questions/support via email & discord. Features & Extras
- Stainless Steel Linear Rails - That's right, no more worrying about rusty rails. You'll still want to grease these rails, but you can do it at the end of your build.
- Linear Rail Mounting Bar - Our kit includes 5 custom 7H size linear rail mounting bar to secure the linear rails onto the extrusions, (no need to fiddle with tiny m2 nuts on a thin plastic part)
- Brass Heatset Insert Tool - We've included a custom machined brass tip for your soldering iron, use it to install heatset inserts with ease! Check here for more information.
- Pre-cut & Pre-wired - Our kit includes all necessary wiring: cut to just the right length and pre-crimped or soldered to their respective parts. See our supplementary wiring guide here.
- Two Types of Nuts - We've included both black oxide hex nuts and stainless square nuts in our kit, use whichever type you prefer.
- Partially Threaded Screws - The small pack of partially threaded SHCS screws (M3x30/x35) are for the mini-afterburner, they help reduce wear on the Guidler and Latch parts.
- Hex Wrenches - We found that 1.5mm hex wrenches wear out easily, so we threw in a bunch of them. However, you should definitely still buy a set of good quality hex wrenches.
- Threadlocker - Rev. A kits include a small tube of threadlocker for use on grub(set) screws. Starting from Rev. B, a separate bag of set screws with precoated threadlocker is included.
- 2mm Drill Bit - Metric drill bits may not be very common in some parts of the world, so we included one. Use it to ream the filament path in your printed extruder parts.
- RTV Glue - Rev. A kits include a tube of RTV glue for securing the heatpad to the aluminium build plate. Check out this great video by Nero3D for assembling a safe build plate. Starting from Rev. B, build plates will ship partially assembled with the heatpad and RTV glue pre-applied. Tips
- Take advantage of the Voron on Discord: https://discord.gg/voron. The community is very active on Discord and the users are very helpful on the #voron 0 questions channel.
- Download Fusion 360 and get a free license to view the 3D model of the printer. The 3D model is a very useful reference when the manual is ambiguous or unclear.
- Check out Nero 3D's Youtube channel , he has a ton of videos on assembling Voron printers.
- Get a serial number once you finish building your Voron.
- The stock LDO kits include 2mm tophat panels, all other panels are 3mm (see supplementary print guide ).However, some vendors will include their own unique panels, check with your vendor.
- The Z axis cable chain may include more links than needed. When installing, move the build plate to the most most position, then fit the cable chain and remove links as needed. Beware, if your cable chain is too long, it may interfere with Z homing! Guides
- Printed Parts Guide (LDO supplement) - Are you planning on printing parts before the kit arrives? Read our supplementary print guide to see which parts to print/replace/omit.
- Wiring Guide - We created this supplementary wiring guide to make wir